Article 1 (Track #1):
Planting a Lavender Display Garden that looks intentional, not accidental
This is part of a two article series, one of which is for Pro’s on our Track #2 channel. Here’s the version for serious gardeners and landscapers.
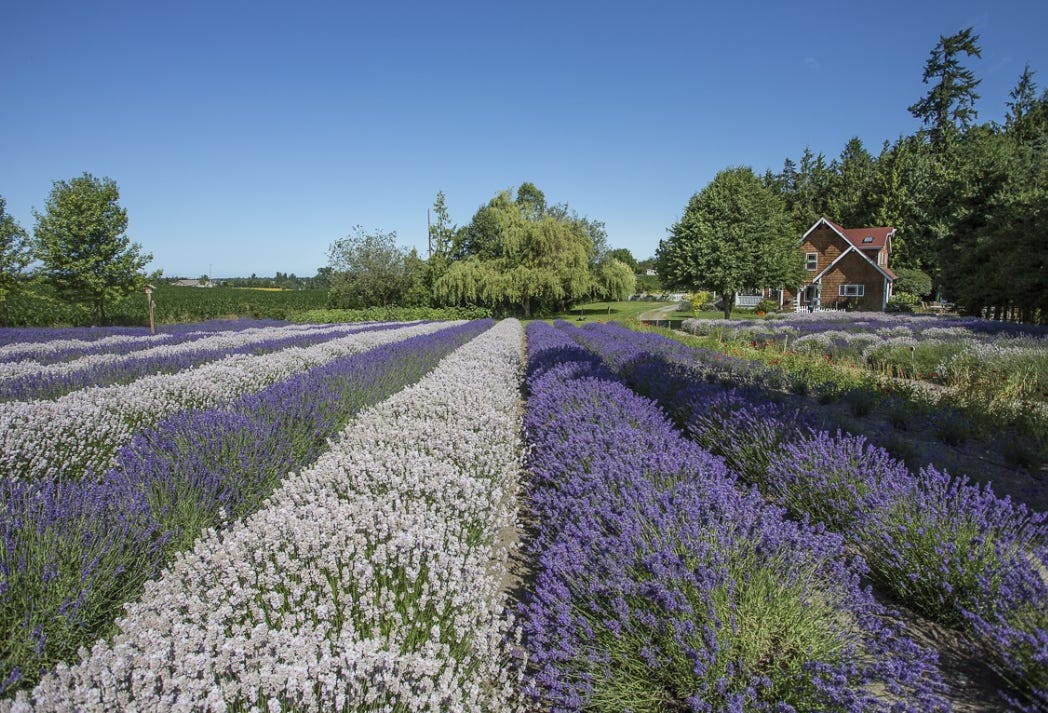
A lavender display garden is one of the easiest ways to create “structure + romance” in one move: tight mounds, soft color, clean lines, and that unmistakable summer scent when you brush past. The trick is that lavender is not a fussy flower—but it is picky about two things: sun and drainage. Give it those, and it behaves like a professional.
Below is a practical blueprint you can follow whether you’re planting 25 plants along a walkway or scaling up into a big showpiece (even hundreds of plants).
1) Start with the job your lavender must do
Pick one “primary job,” and your design gets 10× easier:
Edge + outline: a crisp border along a driveway, path, or fence
Feature bed: a central island bed with symmetry
Scent corridor: a short “lavender lane” beside a patio or gate
Slope stabilizer: a sunny bank planted in repeating drifts
If you’re building a display garden, your win condition is simple: repeat the same plant in long runs. Lavender looks best when it’s used like architecture.
At our “modern homestead” we’re working on a large “flat field” display as well as a “slope stabilizer” display. Both will be used for DIY and bouquet harvests.
2) Site selection: don’t negotiate with the sun
Lavender wants full sun—ideally 8+ hours in peak season. Shade = floppy growth, fewer blooms, and higher disease pressure.
Also: avoid low spots where water sits after rain. If the area stays wet for even a day or two, build the bed up (berm or raised row).
3) Soil prep: drainage is everything
Lavender is happiest in lean, well-drained soil. The common mistake is “treating it like a rose” (rich compost, lots of water). Don’t.
Target conditions
Drainage: water should soak in quickly (no puddles)
Texture: sandy loam or amended soil that doesn’t stay sticky
pH: generally in the neutral-to-slightly-alkaline neighborhood
Fast drainage upgrade (simple and effective)
Build a 6–10 inch berm or raised strip
Work in grit (coarse sand and/or small gravel) into heavy soil
Keep compost modest—lavender doesn’t need luxury, it needs air in the root zone
4) Choose your lavender type by climate and purpose
You don’t need to get overly botanical, but it helps to think in two “teams”:
English lavender (more compact, classic mounds, often hardier)
Lavandin types (often bigger plants, longer stems, high-impact bloom show)
For a display garden, prioritize:
tidy mounding habit (so the bed stays crisp)
strong bloom presentation
good winter performance in your zone
(If you’re planting a newer “best-of-breed” cultivar that outperforms older standards—excellent. You can keep that choice private and still follow every step here.)
5) Layout that always looks good: repeat + rhythm
Here are three layouts that work in nearly any yard:
A) The Lavender Lane (path border)
Plant in a single line, 18–36 inches apart depending on mature width
Add a second row only if you have real space; crowding ruins airflow and shape
B) The Island Bed (centerpiece)
Use a simple geometric bed (oval, rectangle with rounded corners)
Plant in staggered rows for fullness
Keep a clean edge: stone, steel edging, or crushed stone band
C) The Drift (slope or open space)
Plant in “pods” of 5–9, then repeat pods with consistent spacing
Add a gravel path or stepping stones through it for that “walk-in” experience
Quick spacing reality check
Most lavender looks best when you can still see each plant as a distinct mound.
If you want a “hedge,” space closer; if you want “sculptural mounds,” give them room.
6) Mulch like a lavender grower, not a perennial border
For display gardens, crushed stone / pea gravel is often a better mulch than bark:
keeps crowns drier
reduces rot risk
looks sharp with lavender’s form
suppresses weeds effectively
(If you love organic mulch, keep it pulled back from crowns and avoid piling.)
7) Planting day: do it once, do it right
Best timing: spring after hard frosts or early fall while soil is still warm.
Steps:
Lay out plants in pots first (don’t dig yet).
Step back and check symmetry/repetition.
Dig holes only as deep as the root ball (no “bathtub holes” in clay).
Set plant so the crown is not buried.
Water in thoroughly once—then shift to “establishment mode.”
8) Watering: establish, then taper down
First 2–3 weeks: consistent moisture (not soggy)
Next 6–10 weeks: water deeply, less often
After establishment: lavender prefers a drier rhythm than most gardens
Drip irrigation is ideal for big plantings because you can water roots without soaking foliage.
9) The secret to long-lived lavender: pruning
Lavender stays handsome when you prune for shape—every year.
After flowering: trim spent flower stems and lightly shape
Once per year: prune to encourage dense growth, but don’t cut into old woody stems too hard (many lavenders won’t regenerate well from bare wood)
10) A simple plant-count calculator for planning
If you’re mapping a big planting:
Border run: total length ÷ spacing = plant count
Example: 150 ft ÷ 2.5 ft spacing ≈ 60 plantsBed fill: bed area ÷ (spacing²) ≈ plant count
Example: 600 sq ft ÷ (3 ft × 3 ft) ≈ 67 plants
(This is “good-enough math” for planning. The pots-on-the-ground layout is the real truth.)
Wrap-up: Build the bed for drainage, repeat plants for rhythm, mulch with stone for crispness, prune yearly for shape—and your display garden will look like a designed landscape, not a random planting.
Until next time...
I am...
Phil Wilson...
And, here’s to living an Herbal Lifestyle With You!


Solid approach to treating lavander as architecture rather than just plants. The drainage hierarchy makes sense, most ppl overlook how much lavender hates wet feet. The "pots-on-the-ground" layout check befor digging is something I wish I'd done earlier, saves alot of second-guessing. Also the distinction between pruning for shape vs cutting into old wood is crucial.