

Mediterranean Garden Design Underway
Par Terre Herb Beds, Potager & a Lavender Bank Get Us Started

Our landscaping theme for Roadstead Farms is a rustic mediteranean garden and herbal par terre / potager design featuring nice garden paths, 8 raised planting beds, an authentic-looking stone wellhead, and 3 firepits (1. a fun, but non-cooking, Solo Infinity firepit, 2. a wood ember / briquette grilling firepit on our Barebones 30” Cowboy grill, and a third regular campfire area firepit with a simple ring of rocks.
First, let’s look at the basic definitions of our two garden themes: herbal “parterre” and “potager” thingees.

Parterre Herb Garden
A parterre herb garden is a formal garden laid out in a clear pattern, often with straight paths, mirrored beds, and geometric shapes. In a parterre, herbs are not planted randomly. They are arranged as part of a design, almost like a living pattern on the ground. Lavender, thyme, sage, rosemary, santolina, parsley, chives, and other herbs can be used to create low, fragrant beds bordered by paths, edging, or small hedges.
A parterre herb garden is both useful and ornamental. It gives the gardener herbs for cooking, tea, fragrance, medicine, and pollinators, while also creating a sense of order and beauty.

Potager
A potager is a traditional kitchen garden, especially associated with French garden design. It combines vegetables, herbs, flowers, fruits, and sometimes small shrubs in a beautiful but practical way. A potager is meant to feed the household, but it is also meant to be pleasing to the eye.
Unlike a plain vegetable patch, a potager often mixes beauty and usefulness. Lettuce may grow beside calendula. Basil may sit near tomatoes. Nasturtiums may spill over a path. Parsley, thyme, chives, beans, cabbage, peppers, and edible flowers may all share the same garden space.
The Simple Difference
A parterre is more formal and pattern-based.
A potager is more like a beautiful working kitchen garden.
Both can include herbs. Both can be productive. Both can be charming. But a parterre emphasizes design and structure, while a potager emphasizes household usefulness with beauty woven in.

A Lavender Bank Gets Us Started
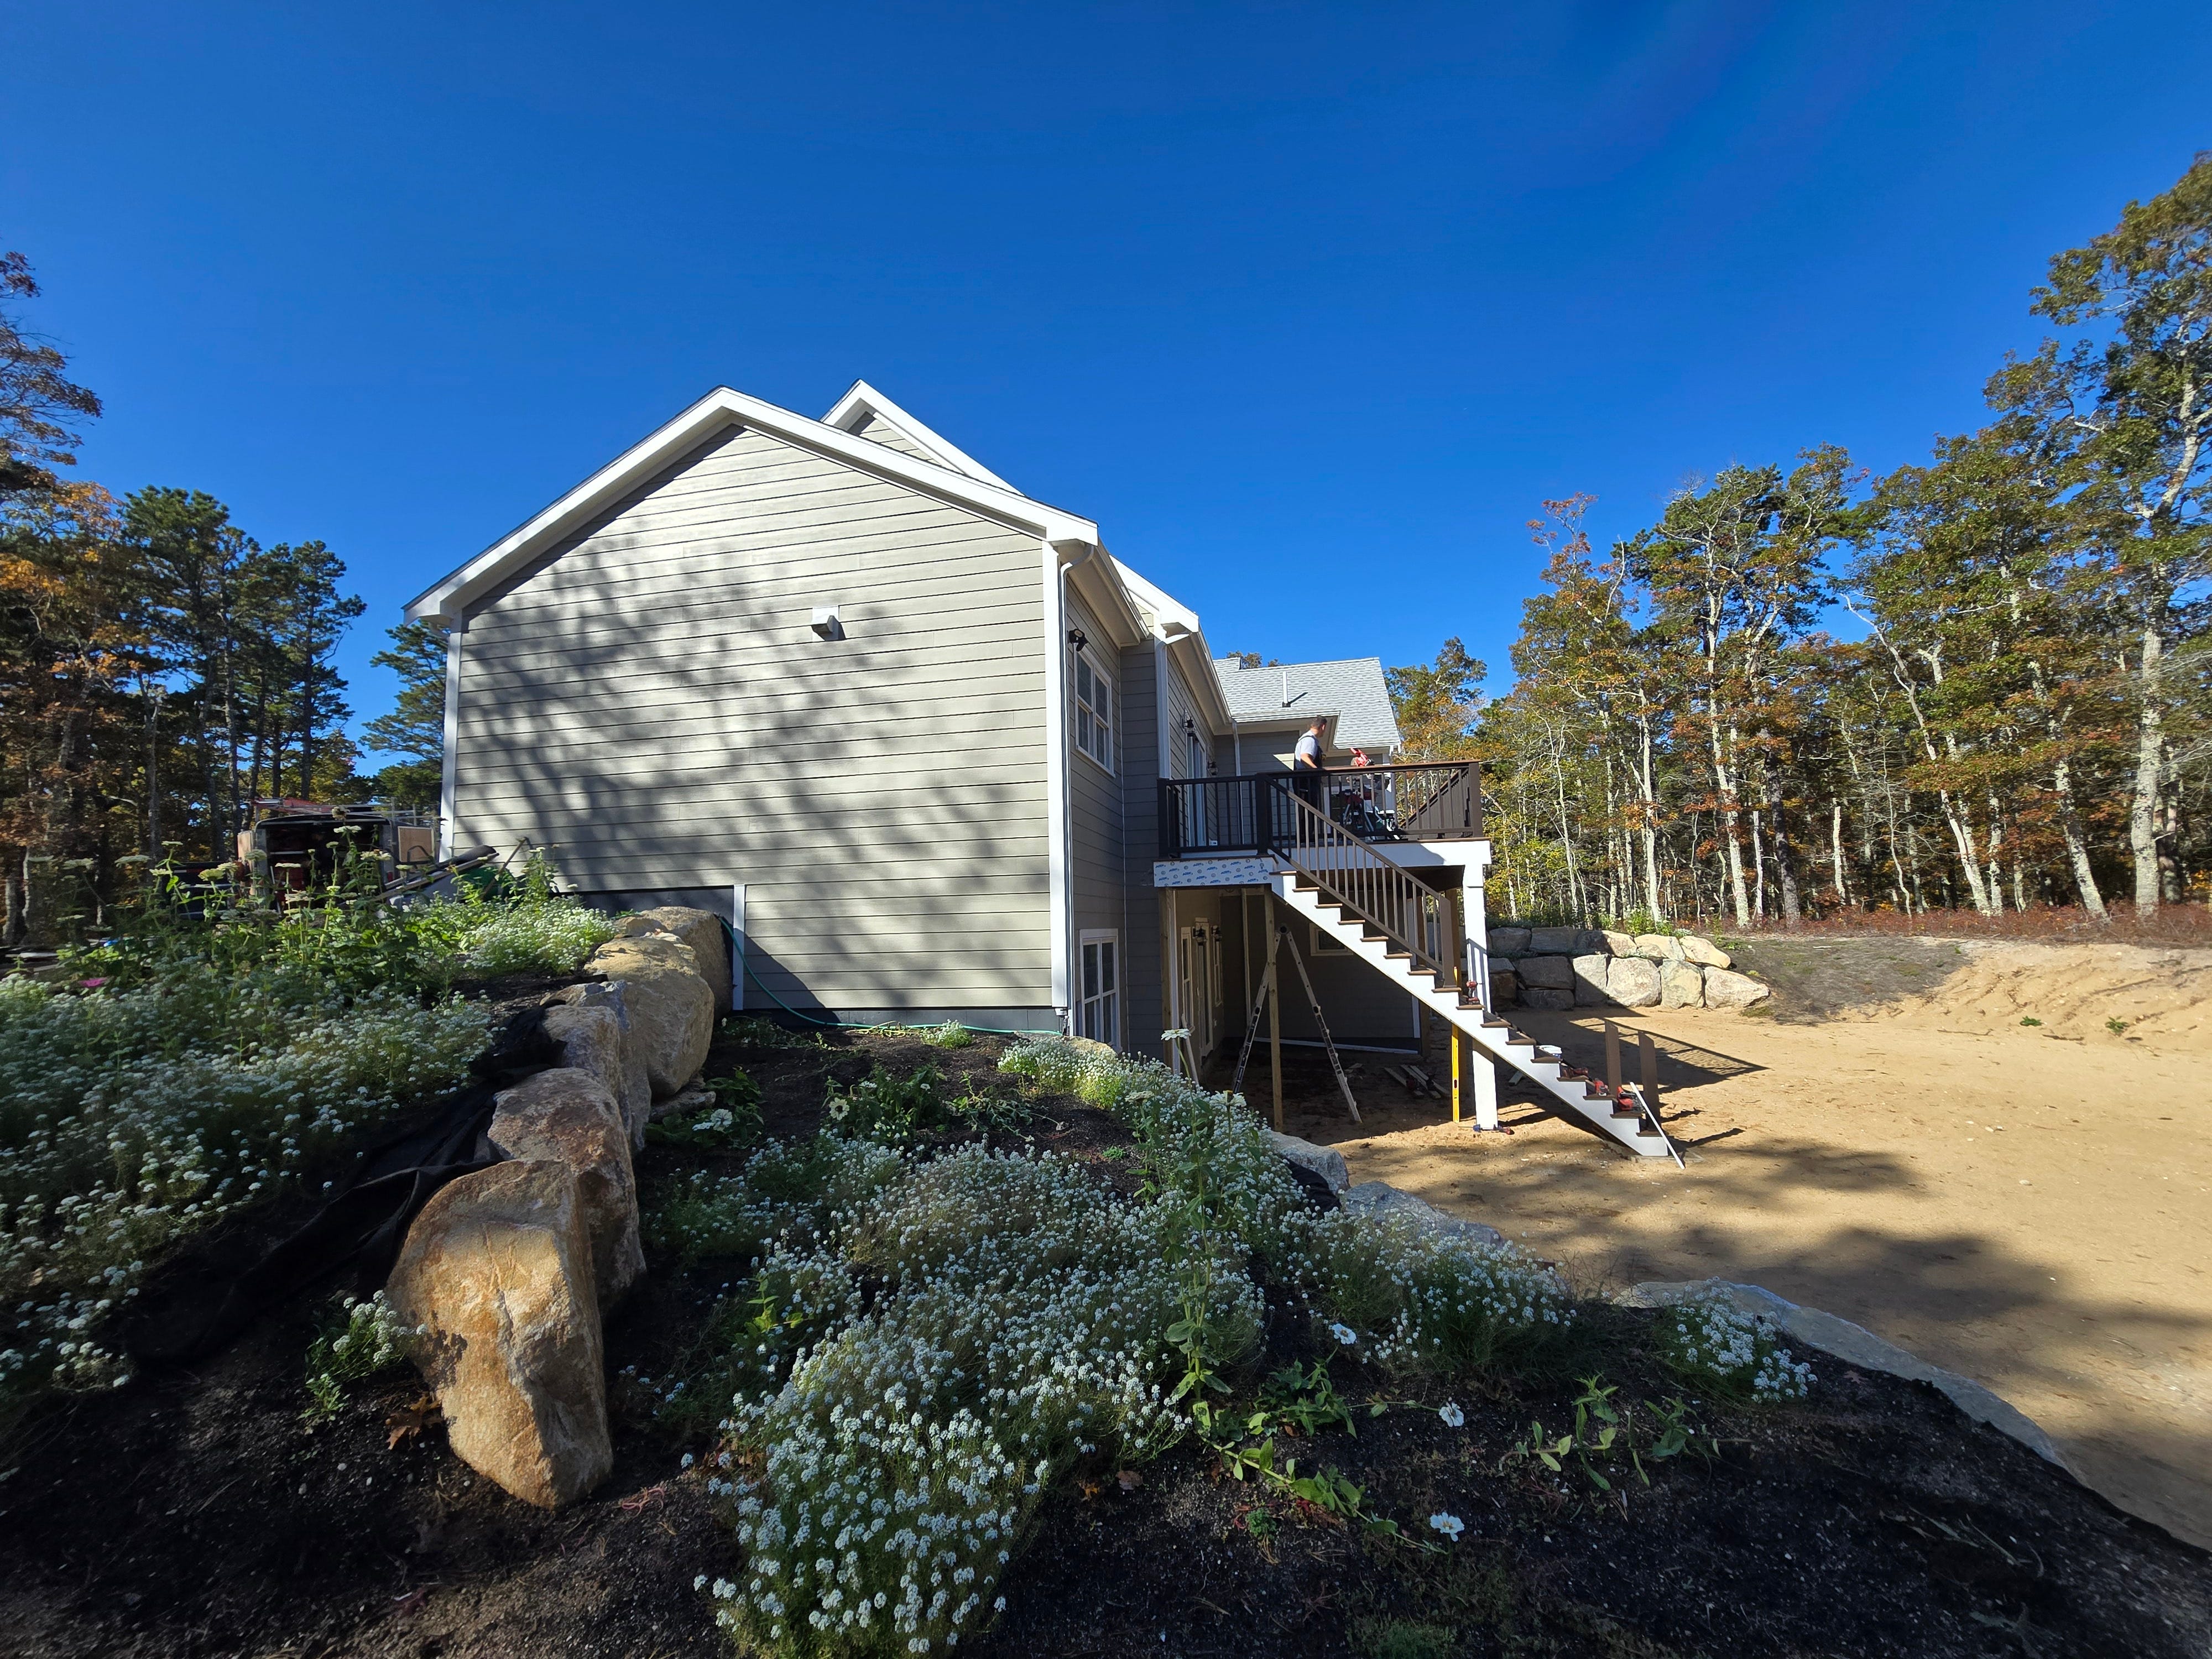
As you can see in the picture above, we have had a sandy slope running across our back yard. Because it is unstable sand and with a steep front face, this area has served as our first back yard landscaping project. Very challenging! A slope like ours would be great for growing prostrate Junipers, or creeping vines. But, we decided to leverage our prior Flintlock Farm lavender business experience to go that route. Here’s our backstory and stages of progression for each of the tasks needed to achieve our landscaping and homesteading objectives.
Our PYO Backstory
We decided, about a year ago, to make this sandy bank a productive lavender hillside for Pick-Your-Own (PYO) operations in the future.
As at our last farmstead, Flintlock Farm in Harvard, Massachusetts we found that people love to cut their own lavender bouquets. So in this article we will feature this project so that you, too, might consider your own lavender crop for the wonderful aroma, deer resistance, drought resistance (once the lavenders are established) and most of all, for the sheer beauty of the lavender plants, themselves.

If you want to go the hobby route or commercial and PYO you will find our tips and tricks in the Track 2 Pro Channel in this blog.
The Tasks
Stage 1 - Pack the lavender bank with wood chips and use a tractor or Bobcat to compress them into the slope.
Stage 2 - Disperse a nitrogen product such as Coop Poop chicken manure to trigger a quicker biological breakdown of the wood chips.
Stage 3 - Add a topsoil and grade the lavender bank so that is contours nicely across the length. Get a solid reading on the soil’s pH.
Stage 4 - Based on your pH reading… you may need to add limestone and if you want to improve the soil’s organic content you could also add worm castings across the graded slope. (Optional)
Stage 5 - Add European Nightcrawlers. (Optional)
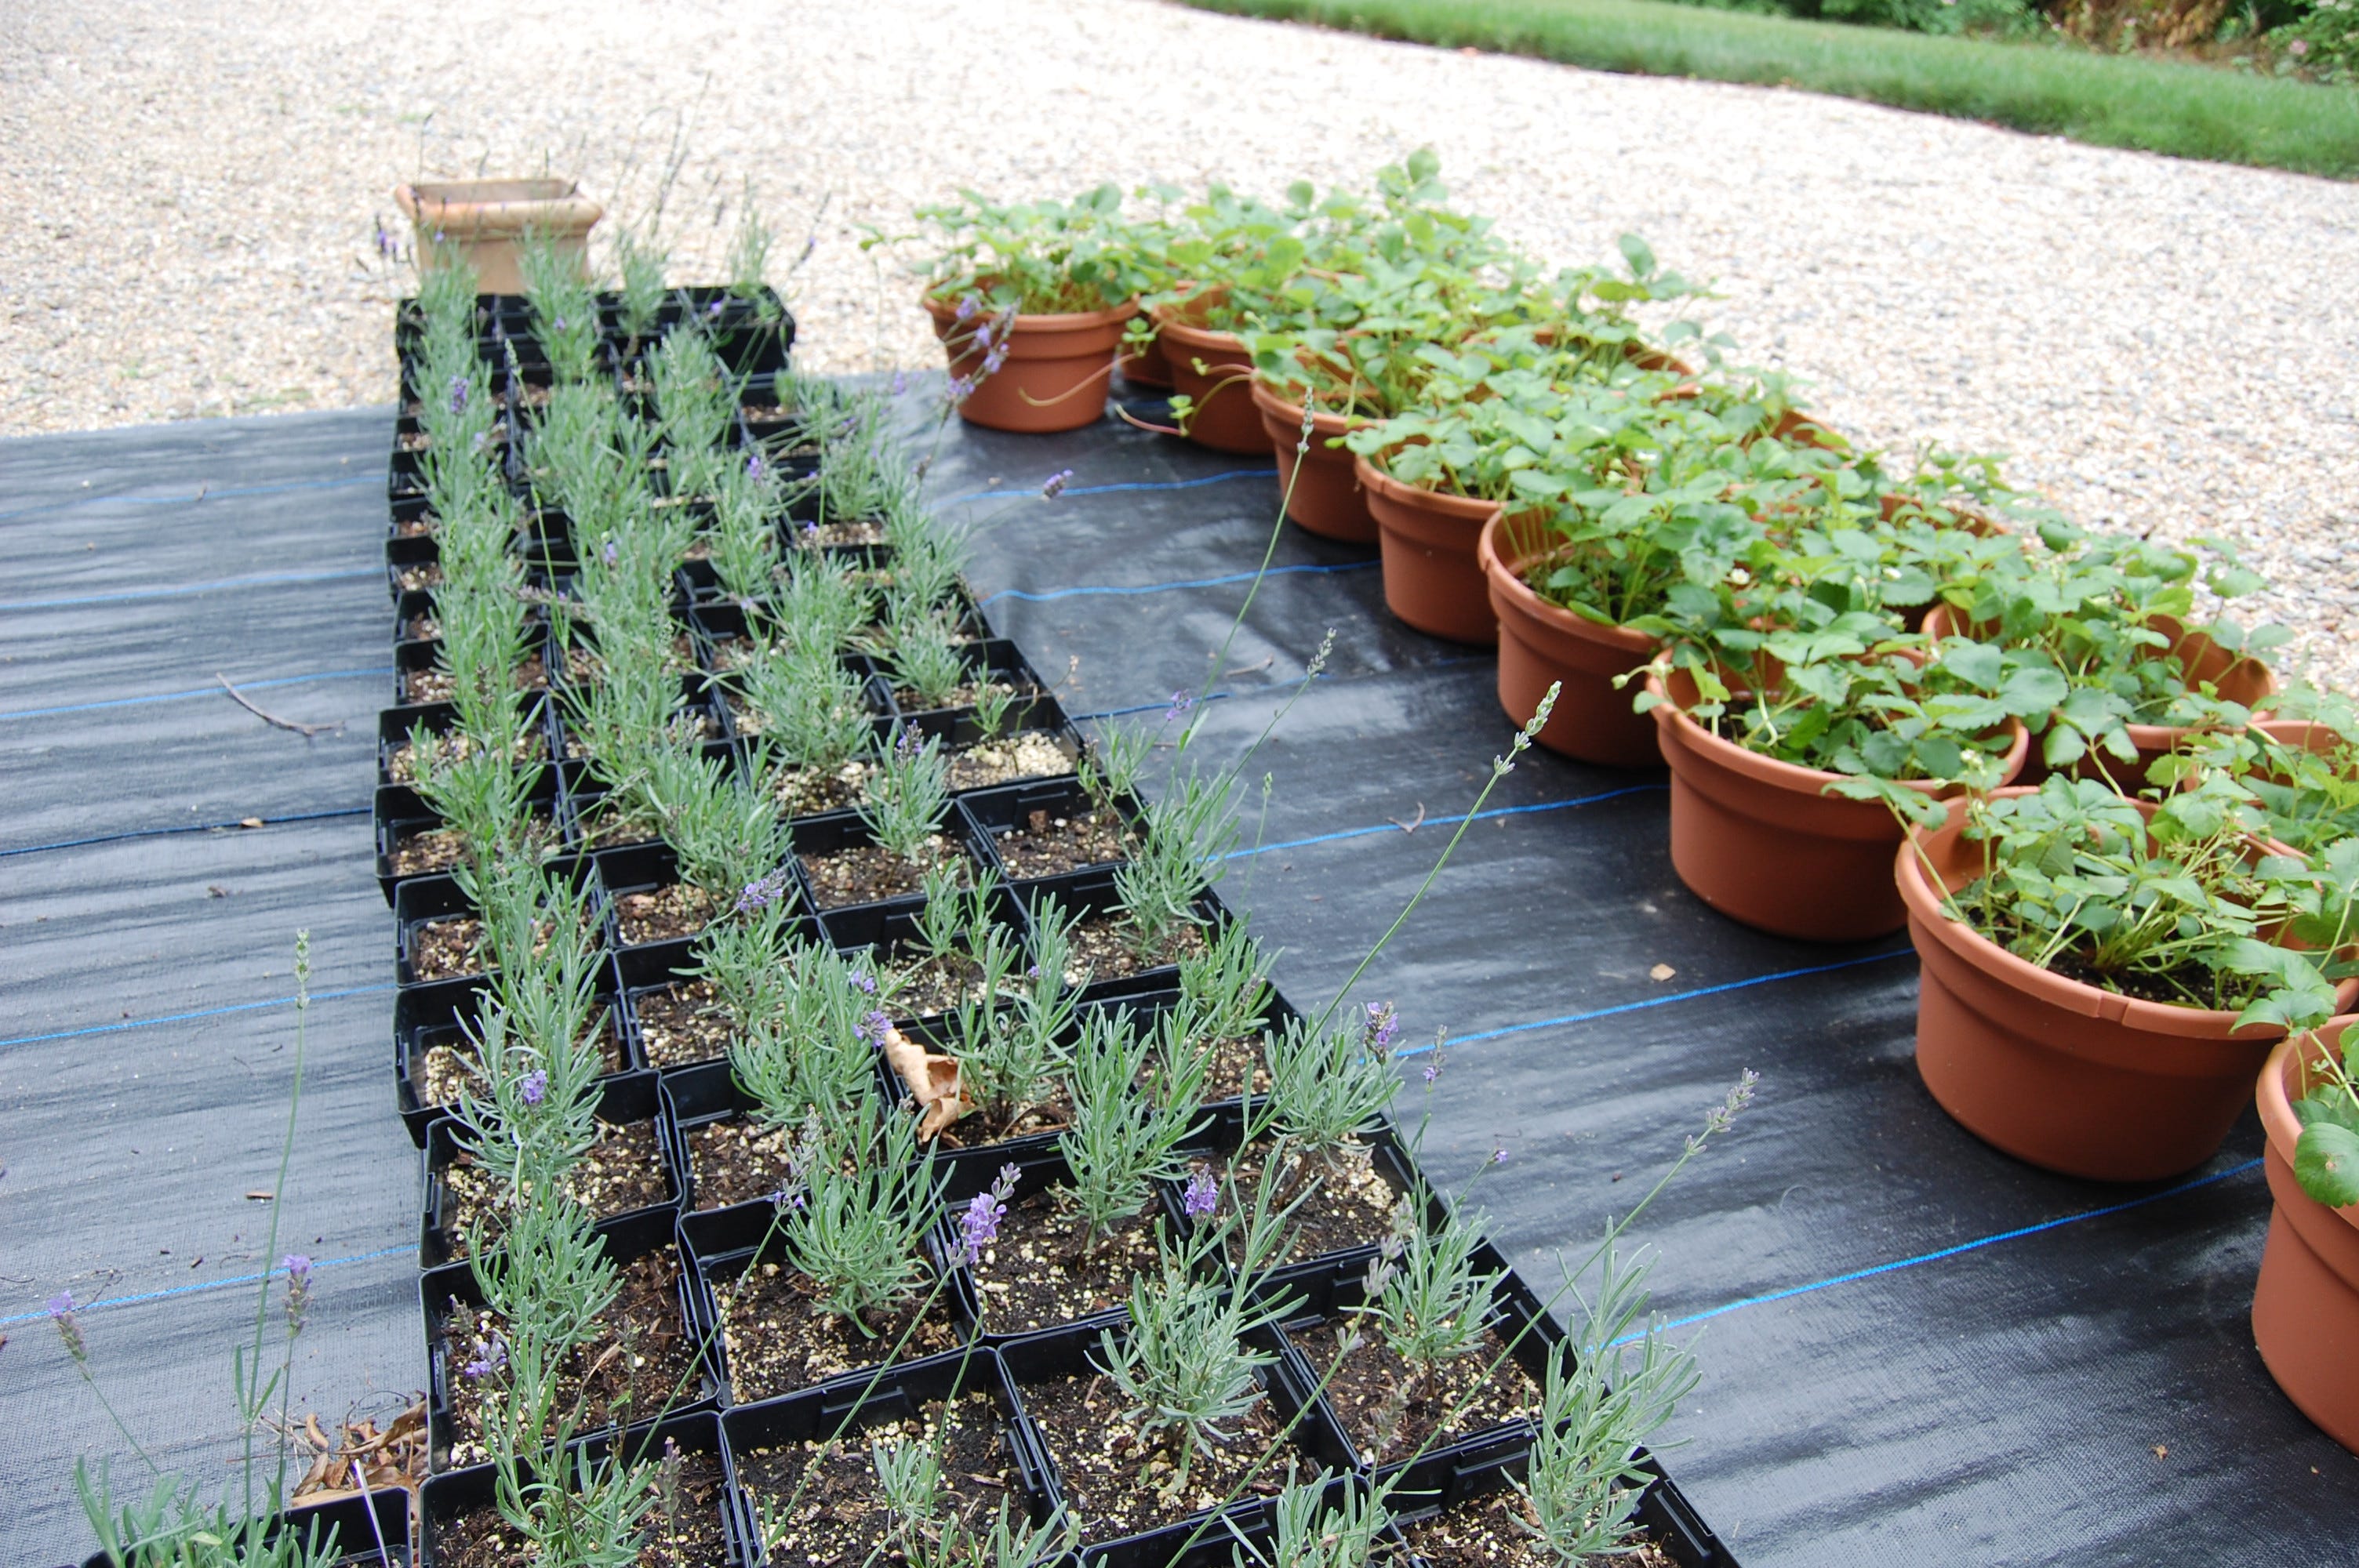
Stage 6 - Install Lavender plants. Use a 3 or 4 foot spacing target.
Stage 7 - Set up watering system with a straight line sprinkler.
Stage 8 - Cover the lavender plants with empty plastic plant pots and then mulch the entire bank. Pull the plastic pot from on top of the plant. Then, pull the mulch away from the base of the lavender plants.
Note: lavender loves stone mulches such as 3/8” pea stone or gravel if you have a flat planting space rather than a steep slope like we do.
Stage 9 - Don’t fertilize the lavenders!


Our next stage, today, is to add a lot of our herbal seedlings such as our mints, our coneflowers, our other miscellaneous.